Lawn Mower Blade Replacement Guide
Dull mower blades not only makes for a less than attractive finish to your lawn, but can also make it easy for disease to take a hold resulting in bare patches, unsightly grass, and a whole host of other issues. When the blades on your lawn mower are dull, the engine needs to work harder to cut the grass. This additional requirement of power places the engine under added stress, which can result in it using more fuel, overheating or becoming damaged beyond repair over time. This is why it's vital to make sure that your lawn mower blades are in good working condition at all times.
Before changing your lawn mower blades
Before you attempt to change the blades on your walk behind lawn mower, it is a good idea to refer to your service manual to confirm what safety precautions you’ll need to take, including safe work procedures and the use of appropriate PPE. If you do not have the appropriate experience to carry out the job, it is always recommended to take your lawn mower to a qualified repairer.

How to change your lawn mower blades
Step 1 - Disconnect power
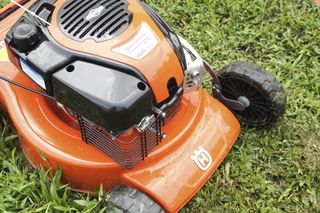
Begin by removing the spark plug cable from the spark plug to make sure that no power is delivered to the motor during the process. To prevent damaging the spark plug lead, be careful not to pull on the lead itself. Instead, firmly grip the lead plug where it joins the spark plug, twist it side to side to ensure it moves freely, then pull straight backwards.
Step 2 – Drain the fuel
Next, it’s recommended to drain any fuel that you have in the tank and close off the fuel supply tap to the engine. This helps to prevent any unwanted fuel spills and makes the entire task a quick and easy one. Store the fuel safely away from where you are working in a clearly marked, sealed container intended for storing fuel.
Step 3 - Loosen the blade bolt
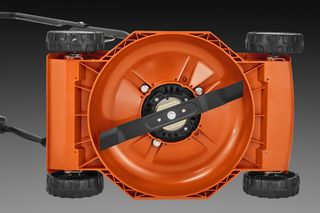
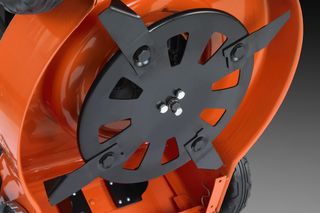
Next, you want to secure the blade by placing a block of wood between the mower deck and the blade itself. Wearing safety gloves, begin to loosen the blade bolt by turning it counter-clockwise. Depending on the type of lawn mower that you have, there may be one or several heat treated blade bolts to undo, which may or may not have special washers attached to them. Refer to your service manual.
Step 4 - Removing & Replacing The Blade
Now you have removed your blade, inspect it for any damage. If there are signs of damage, cracks or dents on the blade, replace it. If you decide to sharpen the blades, start at the heavier end and just do a small amount at a time while paying attention to sharpening evenly across the face, until the blade is balanced. Never sharpen your blades to a knifepoint and try to allow for a 1mm edge.
If installing a new blade, you need to make sure that the cutting edge of the blade is facing the direction of rotation. The blade will have “this way up” embossed onto it. Ensure that the writing is facing toward the deck and that the star on the mandrel is perfectly aligned with the centre hole on the mower blade. Check the balance of the blade once more before tightening it into position. An unbalanced blade can cause intense vibrations that can lead to damage occurring to the mower deck and motor.
Step 5 – Tighten the Bolt
Place the blade bolt into the centre hole and then tighten it to a torque of 30-35Ft/Lb or 45–55Ft/Lb, depending on your mower type. It is important to check bolt specifications for your individual mower’s torque settings to ensure it is not over or under torqued. Avoid forcing the blade bolt when tightening it as this could cause the centre hole to develop small cracks that will worsen over time. Reverse the order of steps 1-2, then start your lawn mower and listen for any suspicious vibrations or sounds that occur with an unbalanced blade. Giving the underside of the deck a good clean to help prevent any debris or clippings from obstructing the flow of air and when combined with the new blades, could see your fuel costs drop by up to 25%.


